Southern Fried Chicken with Pan Gravy
By Brother John
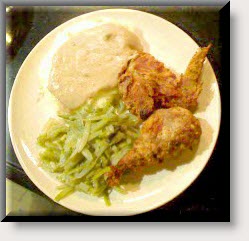
Ask any southern woman the best way to her man’s heart, and she will tell you it’s her crispy Southern Fried Chicken! Today I’m going to walk you through making my version of this all time favorite. We’re going to make Southern Fried Chicken, Mashed Potatoes with Pan Gravy, and a nice veggie side. Yummy! You’ll get the step-by-step right here, and I’ll include a recipe on our sites “Food and Wine Recipes” section to go along with it.
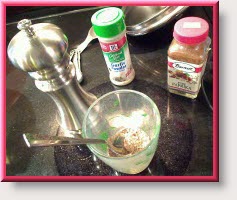
For extra flavor, I like to first make a dry rub that I’ll use to directly coat my raw chicken pieces. It gets flavor directly onto the chicken skin, (or if you are eating healthy, directly onto the chicken meat). Just mix up some sea salt, black cracked pepper, garlic powder, and paprika. Apply generously to your fresh chicken pieces.
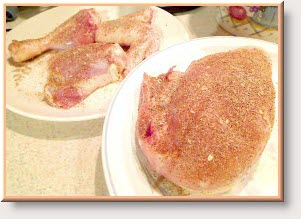
The moisture from your fresh chicken will allow the rub to stay in place with enough remaining moisture to hold onto the first layer of the crispy coating that’s coming up next. Be sure to generously coat both sides of each piece!
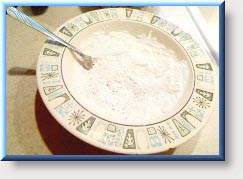
Next, we want to prepare the crispy coating that will go onto the chicken. I like to use a combination of flour, sea salt, cracked black pepper, garlic powder, and cayenne pepper (since I always enjoy a touch of heat). You’ll want to mix these ingredients into a bowl large enough to easily dredge your pre-seasoned chicken. I like to double coat my chicken so we’ll use this mixture in two stages. The first stage is done right after applying the dry rub (mentioned above), and the next stage will occur right after soaking your chicken in an egg wash.
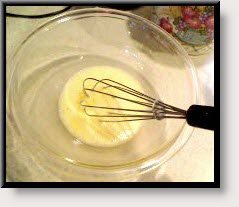
I like to mix up a simple egg wash to which I add a small amount of hot sauce. But that’s just the way I roll!!! Your chicken will then have a layer of pre-seasoning, and an initial first coating of seasoned flour. With that said, it’s ready to take a dip in the egg wash. Your flour coating should get moistened (become a bit gummy) but should not be allowed to actually wash off the chicken. Do this carefully, and slowly. You’ll need enough moisture to later dredge back through the flour mixture a second time. We (in the cooking trade) call this: “Double Dipping”. It makes for a very crispy/crunchy final product!
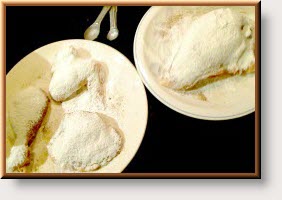
So, let’s review what we now have. We have a pre-seasoned layer, another layer dredged through our flour mixture, an egg washed layer, and a final layer dredged through our flour mixture one more time. Our pieces are ready to be fried in hot oil. (At this point, you could also deep fry these, which is probably better and faster, but I’m going to want to make pan gravy from the rendered fat and oil).
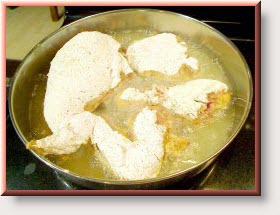
As always when working with very hot oil (350°), please be sure to carefully lower your chicken pieces so that you won’t get burned. I use tongs and try to lower each piece by its front, then middle, and then its back. (If any splashing were to occur this way, it would be away from me, not toward me).
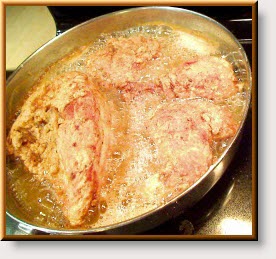
You’re best bet for crispy fried chicken is to let it bask in the hot oil and don’t mess with it!!! I like to fry my chicken in just two passes. Since it takes about 30 to 45 minutes until done, turn your chicken after about half that time. The goal is to have it turn golden brown in the time it takes to be completely cooked (but not overcooked). Practice makes perfect it’s true, but it’s also not that hard to judge if you keep an eye on it from time to time.
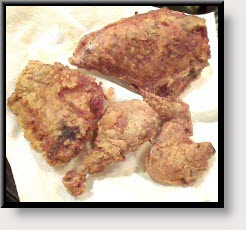
When golden brown and crispy lower your heat (medium-low) and carefully remove the chicken pieces from the hot oil. Place pieces onto paper towels to drain off any excess oil, then we’ll let them rest in a warm oven (175°). The pan gravy will happen fairly quickly so our pieces won’t have to rest in the warm oven for long.
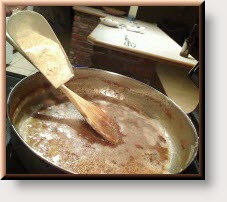
And now for the pan gravy. This will be a milk based gravy that starts out with all that gritty brown goodness at the bottom and sides of our pan. We need to drain off all but a few tablespoons of oil, (but we need to be very careful not to lose any of the gritty stuff!). Believe me when I tell you, the bits left behind are full of flavor!!! Next we’ll add some flower to make a roux (pronounced “Roo” or “Rue”). A roux is made from equal parts flour and oil. You slowly whisk in your flour until the mixture is thick (think plaster of Paris or cake frosting). It’s important to keep whisking/stirring so that the flour will be evenly cooked by the oil. We want the thickening properties of the flour, but none of that raw flour taste. Eventually the flour will begin to brown. You can stop browning at any point between light golden to mahogany in color but don’t go beyond mahogany. The darker the roux, the more flavor added to the gravy. And don’t have your heat too high! You’ll go from white flour to burnt!
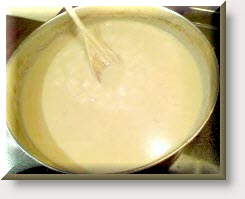
Once we have our roux paste, we can begin to slowly add cold milk to it. You must always add cold liquid to a heated roux and we’ll do this a little at a time. As we add the milk, we’ll keep whisking/stirring it so it stays creamy and free from lumps. As the roux begins to absorb the milk, it will begin to thin out. At that point you can pour in the rest of your milk but continue to stir! To get best flavor, you should simmer the gravy for about 10 to 20 minutes. That will allow all of the remaining flour to absorb the liquid making it silky smooth.
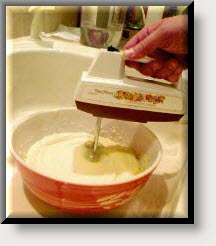
And nothing goes better in the world with homemade pan gravy then creamy buttery Mashed Potatoes!!! Now I know that some of you will pour some of the pan gravy onto your crispy southern fried chicken and that’s fine. But me? I’m a purist. I like my southern fried chicken to stay crispy/crunchy on the outside, and tender/moist on the inside. But don’t worry… I always make up for it with extra helpings of mashed potatoes! Yummy! The only thing left to do is to make up a side veggie. I’m partial to french style greenbeans so that’s what I’ll make. And now… it’s eatin’ time!!!
Brother John’s ‘Tater Soup
By Brother John
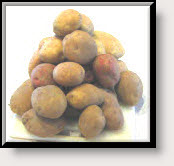
Every year around late September or early October I get hungry for some homemade potato soup. As the weather cools down and the leaves begin to display their beautiful fall colors, a nice hot bowl of rich creamy potato soup really goes down well. It’s also around this time of year that my dad brings Kathy and me a fresh sack of (various) potatoes he’s grown from his personal garden. The potatoes are so fresh they still have some dirt and mud on them from when he dug them up. Evidently, my sister Eydie and brother-in-law Sammy also get this same gift from dad. And like me, it appears they also enjoy a hearty bowl of potato soup! They’ve even posted their own recipe! Check it out in their Wine and Food Recipes section or click right here if you can’t wait. Either way, be sure to come on back when you’re done!
Items to be Sautéed
|
|
|
|
|
|
|
|
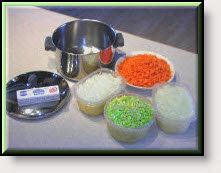
Before I get started I want to point out one thing. If you are going to cook anything, always use the freshest ingredients you can find! Here I’ll be using fresh sweet orange carrots finely diced; crisp, tender celery (including the bright green leaves), also finely diced; and beautiful sweet onions (from my dad’s own garden) which we’ll finely chop as well. (The onions are so delicious in soup that I often double the amount)! I sauté all these ingredients in an entire stick of high quality, lightly salted butter. (Sorry, I’m just not a big fan of margarine). Don’t worry if that seems like a lot, it’s very easy to remove excess butter once the soup is prepared. I’ll tell you how to do that later.
 |
 |
All of the vegetables to be sautéed go into the sauté pot along with the stick of butter. This should be cooked over a medium heat and stirred to keep the veggies from sticking to the bottom. Now… you might very well ask me why I bother to sauté these vegetables? Many of you might simply add them to your liquid and boil away. I’ve found that sweating my vegetables in rich liquid butter imparts a flavor that can’t be beat. And it will slightly speed up the cooking time. Because I make a buttery milk based broth for my potato soup, it doesn’t hurt to give the veggies a head start and this becomes the perfect time to add a little sea salt and freshly ground black pepper. It also smells heavenly! Talking about cheering up your kitchen on a dreary Autumn day. This will do it for you!
Let the cooking begin!
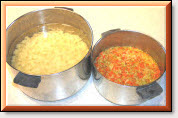
You’ve probably noticed that I haven’t included measurements. And there is a reason for that. I knew I wanted to make a rather large batch of potato soup, perhaps as much as six quarts and that meant I had to use the largest pan I own. So I put some fresh spring water into it and then diced enough of dad’s potatoes to fill it half way with an inch of water on top of that. Good starting point. I then added the sautéed veggies and that told me what else I needed to do. Sometimes that would be to add more water, but this time it needed four additional potatoes.
 |
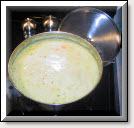 |
A soup stock made of fresh spring water would not really be much to write home about. But I like to let the potatoes cook a while in water until they are just starting to soften up. Then I add a mixture of evaporated milk, and fresh cream. This actually turns my pan of water into a pan of creamy milk and causes the soup to start looking like potato soup. (You know… I didn’t have anyone to take these pictures so I tried the old “Hold the camera in one hand while pouring with the other” trick. And it actually worked! I had expected I’d either end up with liquid running all over my stove top, or that I would totally miss the shot. But I managed to get both right the first time!).
My potato soup will still needs three more ingredients before its done, but one of them is very interesting. We’ll talk about that one next.
 |
 |
Potato soup can really benefit from a few hard boiled eggs! The trick is to first hard boil them, and then separate the yolk from the egg white. The bright yellow yolk can be broken down into the texture of course sand, which can then be added to the potato soup to give it a very rich flavor.
The added protein will really pick you up on those cold Autumn days. (I know of others who also do this and they use both the egg yolk and the egg white. Kathy doesn’t care much for the egg whites so I save them in a bowl wrapped in cellophane. I’ll show you how I use them later on. Remember… nothing shall be wasted!).
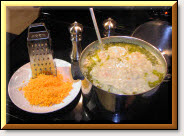
I then like to get my soup up to a mild boil and add freshly grated sharp cheese to my potato soup! Melted cheese tastes great and will also give you some added protein. I also like the orange color it adds to an otherwise very white soup. It’s also a good time to add some fresh parsley, but I didn’t have any in the house. I did have dried parsley, so I added a generous portion of that to give a little green color here and there to my soup. We eat with the eyes, so color is an important factor!

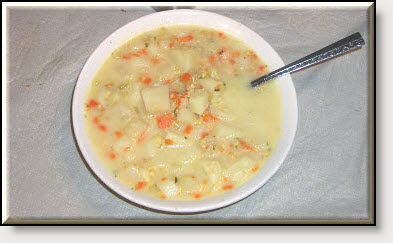
Which brings us to the final product. A big pan of Brother John’s homemade potato soup! During this final stage, excess butter will simply float to the top where it can easily be skimmed away for those who want to restrict their butter intake. You should really try to make this soup for yourself because it’s hearty, it will fill you up, and will bring a bit of sunshine to any dreary day!
SIX QUARTS OF GOOD EATING!

Kathy and I won’t go hungry for a while with six quarts of potato soup. I’ve even been known to get up at 2:30am and make a bowl as a “midnight” snack! There are two points I want to leave you with:
Hope you enjoy making and eating Brother John’s ‘Tater Soup!


